02
Jun 13Visiting the CRP factory
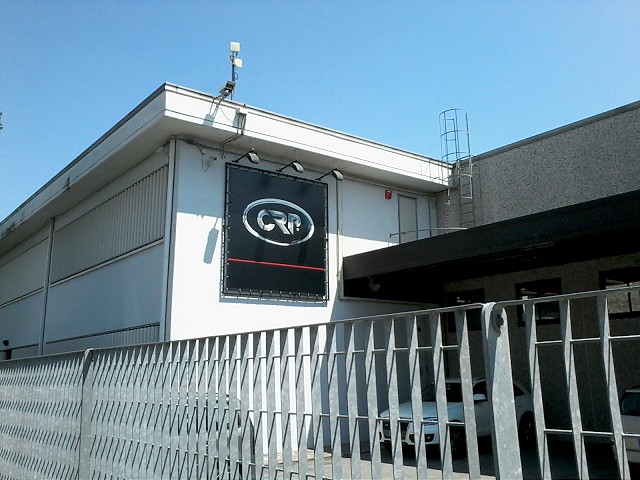
Motor Valley, Italy. The region encompassing Bologna and Modena that has birthed the likes of Ferrari, Lamborghini, Pagani, Ducati, Bugatti, and Maserati, and most recently CRP.
CRP is actually a group of 6 companies with long standing operations in precision machining, additive manufacturing, motorsport, and R&D. There is even an American branch – but more on that later. CRP joins the ranks of premium Italian motorsport OEMs with this :

The soon-to-be-released Energica electric sportbike . What really excites me about the Energica is that it is a real sportbike. There are some fantastic upright-sitting electric motorcycles now on the market – but it’s the crotchrocket formfactor that really gets me my jollies. Weight has yet to be specified, but the machine will host a 100kW electric motor and nearly 12kWh of battery. 😀 These are the kind of numbers I’ve been waiting for in an electric motorcycle; the CBR 600RR in my garage should be cowering in fear. The Energica’s 118 ft lb gob of torque, unscrupulously delivered by Mr. Heaviside, will definitely bring an EV Grin to many new faces. If you are able to go easy on the throttle, you should be able to get about 90 miles on a charge. From ’empty’ (0% SoC) the battery recharges in 3 hours over a level 2 AC connection, or 30min to 80% if you can find a fast DC charger. Before you say it – yes – the Energica will not [yet] be price competitive with current ICE bikes. It comes in at $22k , whereas a 600cc sportbike is about half that. Though its also worth mentioning that the Energica will integrate a laundry list of premium components from Brembo, Pirelli, Sachs, Marzocchi and others.
The tour began with a look at a few former racing machines from CRP’s participation in Moto2, 125cc MotoGP, and Formula 1.
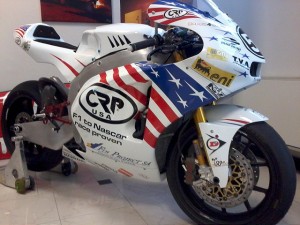
CRP USA moto2 entry
After being greeted with a nice schwagbag, I was introduced to the company’s technical director, who happily led me through the machining building. I won’t claim to to have seen any great number of machine shops, but this place was pristine. Primarily producing F1 and other race components for top tier clients, they understandably have one hell of a collection of cutting edge CNC machinery.
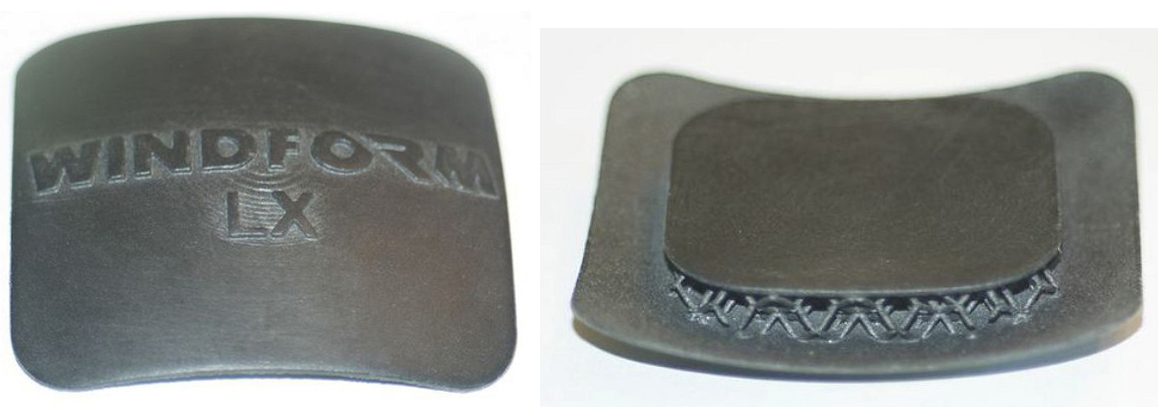
Next I was shown the 3D printing side of the business. Prior to my arrival I had no idea of their involvement in this industry. CRP’s Windform is a line of roughly 7 different types of 3D printable carbon composite. The composite is strong and lightweight (though in slightly different ways than other carbon fiber products) and is printed with SLS (Selective Laser Sintering) machines. Extremely cool to watch. Here is a video that gives a good overview of the process:
Even more remarkable is the shapes this can produce, and the material properties that can be achieved. Quite literally, this can produce shapes that are impossible to make via traditional methods, and no support structures are required. Check out the internal fill structures in this LX sample:
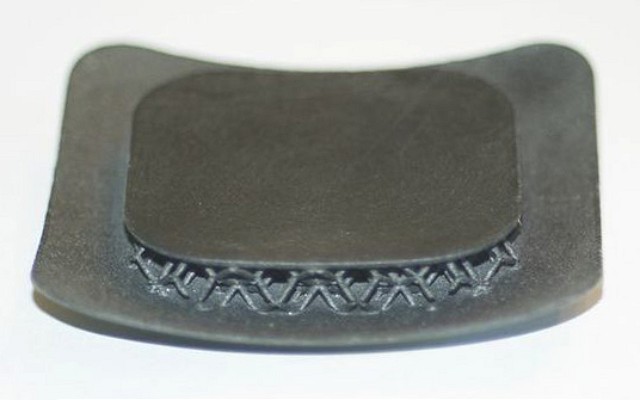
Though it was the SP sample that really put my jaw on the floor:
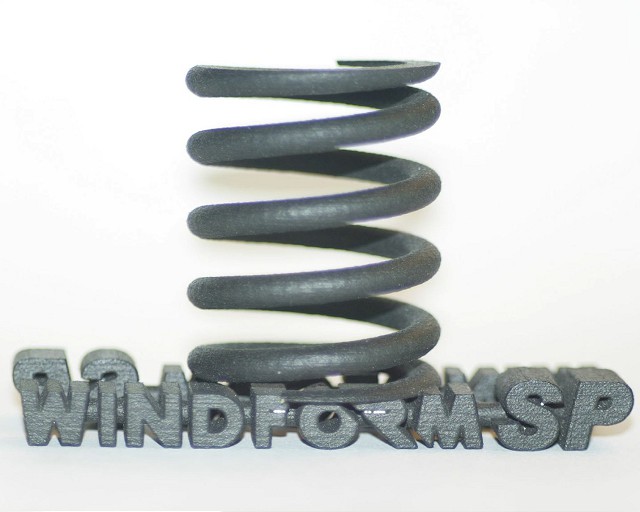
3D printable compliance! Imagine the unconventional spring shapes that can be created – with spring, damping and other parameters governed by internal fill structures. Really too cool. Windform is also printed by CRP USA in North Carolina mostly for NASA and NASCAR.
 In the electric motorcycle R&D facility I was shown the 3 eCRP motorcycles which were raced in the TTXGP series; taking a the 1st in 2010. The CRP’s electric racing program is now suspended as they are devoting efforts to the production machine. Clever of them to start with a racing program for R&D and brand building before moving to a production machine. A few other iconic Italian brands followed similar footsteps in their early days. At the time of my visit there were no completed Energica bikes present (off for ABS testing) , and the team was busy calibrating the powertrain on a dynamometer/usage simulation rig. Though I did get to see some nice looking prototypes of the trellis frame, 3D printed fairings, and a few other miscellaneous bits.
The Energica arm of CRP recently came under fire as they pushed their 2014 expected delivery date to 2015. The CTO and PR people I spoke with stressed that , despite being a new OEM, they fully intend to deliver a product that meets with Modena standards of quality and perfection. All previously reserved motorcycles are receiving an ABS upgrade at no additional cost; the 2014->2015 delay is mainly to adequately test and validate the ABS system. In Europe ABS will be required in all motorcycles sold as of 2016.
Prior to my visit I knew little about CRP beyond their TTXGP race entries and street machine prototypes. My visit to the headquarters revealed a fully fledged and multi-faceted engineering operation, with deep ties in performance vehicle industry. From what I saw, CRP really is a company with the chops to bring a fresh performance motorcycle to market. Personally, I wish them best of luck. Not because they will need it, not even because it is a family business with an extremely kind and enthusiastic staff, but because what they are doing is damn exciting and I can’t wait to ride one.

Links:
13
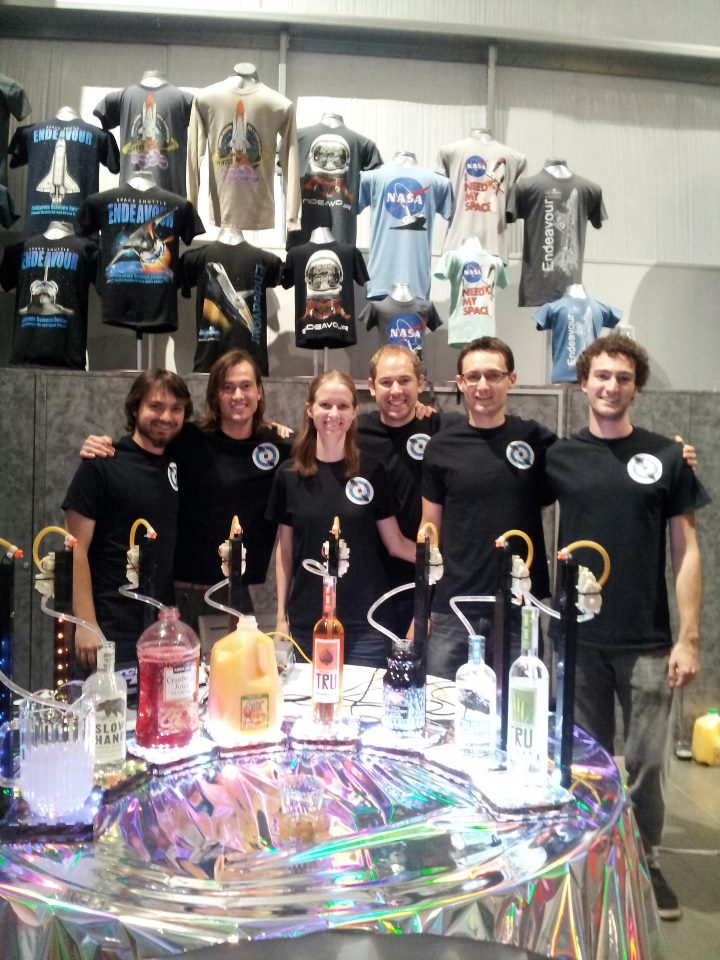
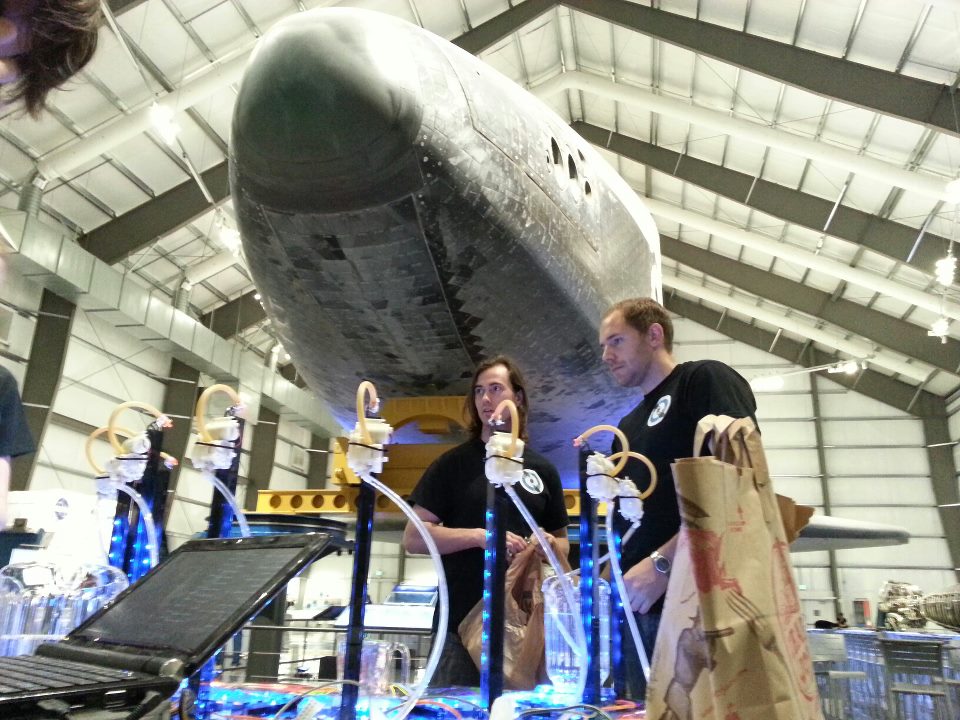
Apr 13Spirited Robotics at Yuri’s Night LA
Spirited Robotics serving drinks under the Endeavor Space Shuttle at Yuri’s Night Los Angeles:
Video showing the new design:
Join us on Facebook!
https://www.facebook.com/SpiritedRobotics
21
Mar 13Goodbye Google Reader
today I found out that Google Reader, one of my favorite google products, has been sentenced to /dev/null
(T_T)
I can only hope that this is because (like with GOOG411 and Google voice search) it will soon be replaced with something much much better, but I’m not holding my breath. looks like I’m in the market for a new rss manager. recommendations welcome.
29
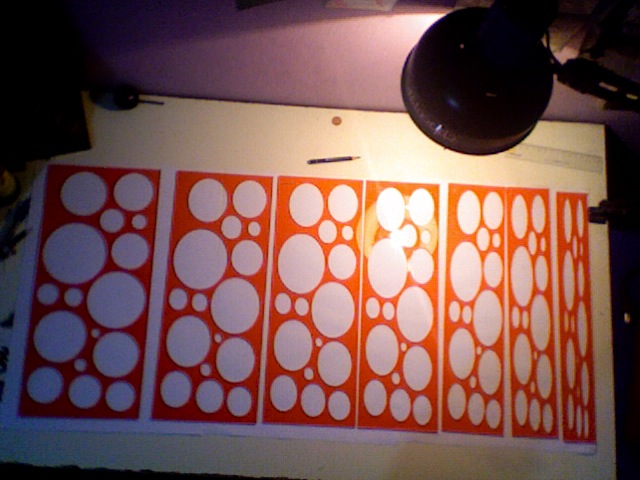
Jan 13Ellipse Stencils
Just picked up my first laser cut acrylic design! nothing too exciting – just a set of ellipse stencils [for much cheaper than you would find at an art store] made using ponoko/vectorealism. Even though this was dreadfully simple, it gave me a fresh reminder of that special feeling you only get by bringing a design into the physical. Its an addictive feeling.
In case you want a set of these stencils for yourself, you can purchase the finished set on Ponoko, or just download the design file for free here (it is creative commons licensed after all)
PS yeah i know , its been waay too long between updates.. remind me and i’ll come up with an excuse for that later

28
May 12house
Recently got hold of blueprints from the house i grew up in. Figured i’d try my hand at modeling in sketchup.
Results:

02
Apr 12Battery Roundup part 2: now in 3D!

As a continuation of my quest to overanalyze the purchase of a big lithium battery pack, i decided I’d write something up to give me a better feel for the actual physical size of the pack. Though i’ve started to learn Rhino 3d v4, I decided do this with sketchup/ruby because 1) the scripting capabilities seem more powerful 2) im already fairly comfortable with sketchup as a CAD program. Rhino 3d v5 supposedly has a Python API, but afaik there is no trial for v5… This is my first Sketchup plugin, so comments are more than welcome. You can download it from:
http://www.hardwarewasteland.net/shared/draw_batt_1.0.zip
The script constructs a rough 3d model for all the batteries described in the Google Spreadsheet:
https://docs.google.com/spreadsheet/ccc?key=0AtZJWDjB-E4xdDVETlFTOFNwUGswcjVFYkU4Wk85NUE#gid=0 (stored locally)
The purpose of this is to give people researching EV parts another tool to compare the approximate sizes of battery packs.
To use simply extract the contents of this folder to your Sketchup Plugins directory (generally something like C:\Program Files\Google\Google SketchUp 8\Plugins) and restart Sketchup. Click Plugins>Draw Batteries and the webdialog should appear.
05
Mar 12Santa BarBot 2012!
~12 days ago i read this:
http://robogames.net/barbot.php
A San Francisco Cocktail party where the drinks are mixed by robots?!? There were 10 days remaining before the event, just enough time to build one, i thought…
Late that night I sent out a frantic email to the ever so special cross section of my drinking and geeking buddies, asking who wanted to partake in the build. At t-184hours the dreamteam had been assembled; we held our first meeting and [mostly] converged on a design:

Mechanical:
Friday parts were purchased, and Sat/Sun we took over another good friend’s [well equipped] garage for the build party.
Most of us also have regular (or semi regular) jobs to balance with this, so in the following week we had quite a few very late nights of coding, fabricating, mounting, testing and drinking! (had to test all the recipes of course)
At t-6hours we had it pretty much all together though there was still some coding to be done on the ride up to SF, and some of us were still recovering from rigorous testing the night before. We didn’t get to Parisoma until around 7, and did not have our robot entirely setup until after 8 when the venue had already become good and crowded. On the ride up a few pieces became bent/broken and had to be fudged back into place. Runs ended up making a royal mess and nailed our first customers with a dose of lime juice to the crotch.. counter to our engineering intuition, the ‘danger’ factor associated with our robot helped to make it all the more a crowd pleaser.

Overall the event was one hell of a good time, and I’d do it again in a heartbeat. There were 14 robotenders in service and enough of a turnout to piss off a firemarshall. We got a bit of a kickback to help cover transportation, but the majority of the proceeds go to student involvement in robotics and the robogames’ main events. We were also encouraged to sign up for Roboexotica, an event that is supposedly bigger, badder, and Austrian. I will certainly be looking into this

Shown above are the core team members (minus 1) and our Santa Barbot. I’ve gotta say, I really regard myself as fortunate to have such a slick bunch of engineers as friends. I think the fact that in ~1 week we went from idea to f****** awesome robot that takes a voice command (Siri) to make a Pan Galactic Gargle Blaster, speaks for itself. Cheers friends, I think we’d have done Douglas Adams proud.

Also seen on the Make Blog!
01
Feb 12Battery Roundup
As I am now back in SoCal I’ve been doing a lot of thinking about how I’m going to eventually upgrade my motorcycle. What it needs most desperately is a lithium battery pack, charger, and BMS. First step is to get up to speed on whats available; this is what I came up with in my first bout of research. Also , because i have a fetish for visualization, i whipped up a quick sketch to create a series of “DDR Difficulty” graphs based on the 5 most relevant of these metrics: Specific Energy, Energy Density, Cost per Watt Hour, Continuous and Peak Discharge rates.

You can download the source here. To use it you will need Processing. Download the spreadhseet (linked above) as a CSV, make sure it is named battData.csv and is located in the data folder. There is a “Compare in vis” column in which you select 6 batteries to compare. If you want [to be awesome and] contribute to the list of batteries request edit priviledges on the google doc and i’ll approve you.
I could still improve the visual, as there are two things are potentially misleading.
1) every manafacturer seems to want to rate their batterie’s Ah capacity at different discharge rate. ie one 60Ah battery may fall to 40Ah when discharged at 1c, while another may only fall to 55. As 1c is closer to reality in an EV application. I’m considering editing the table to use approximated 1c capacities, as opposed to the advertised number. Such guestimations i think would still be more accurate than strictly following the advertised numbers.
2) As the batteries are directly contrasted with one another a value may seem low, while in reality it is quite adequate. For example Headway cells seem to have a rather low constant current and pulse discharge rate, however 5c/10c is plenty for most applications. At 5c the entire pack is drained in 12 minutes! this only seems low because there are also much higher discharge rate discharge batteries available.
Conclusion: Turnigy Lipos pretty much clean up. I’ve also heard good things about Hyperion, though I have yet to find a supplier; so they are not in the spreadsheet. Very impressed with whats available now, compared to when i first did the conversion in ’09. I just need to figure out how to keep those RC batteries well balanced and make sure they don’t explode. you know, the details xD
25
Jan 12EV Talk
Had a good time last night at the Tokyo Hackerspace giving a short talk on Electric Vehicle tech and how to convert a motorcycle. Slides can be downloaded here,

more about my conversion in the original post
–Z