Working in the UCSB Robotics Lab I’ve had the fortune of getting to play with one of those adorable little chewable linux computers , during the ~week before my move to Japan. While unfortunately I wont get to see it though to its installation as the nervous system on a hoping robot, I’ve had the adventure of getting it all up and running with the ROS (Robot Operating System) toolchain. I pulled a bit of hair out during the process, so hopefully this post will prevent others from having to do so.
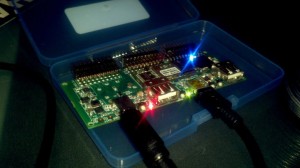
As of now, this blog describes the process of getting Gumstix to boot Ubuntu Natty from an SD card , autoconnect to wifi, and subscribe to a ROS topic.
I’m using a Gumstix Overo Fire COM, 8GB SD card, and the new Robovero daughter board.
You don’t need that exact hardware, but at minimum:
- -Gumstix Overo Air/Fire/FE
- -Micro SD card (8 GB in these examples)
- -Overo daughter board (could be pretty much any one)
- -A wireless (or wired if you have the right Gumstix daughter board) network that both the Overo and Host computer can connect to
Creating the Bootable Ubutnu SD Card
First grab a copy of rootstock – a nifty tool we will use to create our armel ubuntu image:
# apt-get install rootstock
cd to someplace where you dont mind making a mess:
# mkdir gumbuntu
# cd gumbuntu
Now to generate the image:
~/gumbuntu# rootstock --fqdn overo --login robot --password temppasswd --imagesize 8G --seed wget,vim,linux-firmware,wireless-tools,wpasupplicant,usbutils,build-essential,tmux,openssh-server,lynx,python-yaml,cmake,subversion,wget,python-setuptools,pkg-config,python-dev,ntp,libboost-dev,libboost-all-dev,libapr1,libapr1-dev,libaprutil1,libaprutil1-dev,liblog4cxx10,liblog4cxx10-dev --dist natty --serial ttyS2
You may want to edit this somewhat. For more info on rootstock see https://wiki.ubuntu.com/ARM/RootfsFromScratch
This is bound to take a while. So in the meantime crack open a new terminal session and get your sd card formatted and bootable by following the directions here. STOP after copying MLO u-boot.bin and uImage to the boot partition, because we will be using our own rootfs image. You can download MLO u-boot.bin and uImage from here.
Once rootstock has completed unzip everything to the SD card’s root partition (lets call it sdroot)
~/gumbuntu# cd /media/sdroot
/media/sdroot# tar xvaf ~/gumbuntu/armel-rootfs-[creation date].tgz
This will also take a while. Make yourself useful by getting your Overo ready for the next step. The Ubuntu image we are building unfortunately does not have built in support for the Overo’s wifi chip, so we are going to swipe the modules and firmware from the nand image (which we know works). You could probably also find this stuff on the interweb , but this way is a pretty simple one stop shop for everything. If your kernel versions do not match you may be better off extracting the stuff from one of the Gumstix images to avoid compadibility issues.
Copying Modules and WiFi Firmware
Plug the daughter board into your desktop as you would normally to get to the serial console, give the boards power and let the Overo boot into the NAND Angstrom distro. We will be connecting to a wifi network to transfer files, becasue afaik there is no reliable way to do this over the serial connection. From the console (in a session thats not extracting files):
$ screen /dev/ttyUSB1 115200
[you will see the overo booting into Angstrom]
login: root
# ifconfig wlan0 up
# iwconfig wlan0 essid [your SSID]
# dhclient wlan0
# /etc/init.d/sshd restart
If you use encription you are going to have to set up wpa_supplicant.conf , but I’ll trust you know how to do this. The sshd restart probably isnt strictly necessary, but can’t hurt. Also don’t forget your Gumstix’s IP address; lets pretend its 192.168.1.14
Once the files have finished extracting from the SD card you will want to do the following (from a fresh terminal ) :
# cd /media/sdroot/lib
/media/sdroot/lib# scp -r root@192.168.1.14:/lib/modules/* modules/
/media/sdroot/lib# scp root@192.168.1.14:/lib/firmware/sd8686* firmware/
/media/sdroot/lib# cd ..
/media/sdroot# scp -r root@192.168.1.14:/etc/network/* etc/network/
/media/sdroot/lib# cd
# umount -a
Your bootable Ubuntu MicroSD card is now all ready! plug it into the Overo and give it a go
Installing ROS
Log into your Gumstix Ubuntu distro with the username/pass you used in the rootstock command, connect to your router and install ros by running:
# ifconfig wlan0 up
# iwconfig wlan0 essid [your SSID]
# dhclient wlan0
# apt-get update #not really needed yet, but verifies that you are connected
# easy_install -U rosinstall
# rosinstall ~/ros "http://packages.ros.org/cgi-bin/gen_rosinstall.py?rosdistro=diamondback&variant=ros-base&overlay=no"
go get that cup of coffee.
now I’ll assume you can get your router to statically assign IPs , if not you will have to change things every time your router does. Edit /etc/hosts to include the name of your desktop computer (which will be running roscore) lets pretend your desktop has IP address 192.168.1.4, and you want to name it desky
#echo "192.168.1.4 desky" >> /etc/hosts
#echo "source ~/ros/setup.bash" >> ~/.bashrc
#export ROS_MASTER_URI=http://Desky:11311
. ~/.bashrc
Now ROS is all set up! lets just configure the Gumstix so that it automatically connects to WiFi on boot.
Network Config
In /etc/rc.local put:
#ifconfig wlan0 up
#iwconfig wlan0 essid [your SSID]
#dhclient wlan0 -4
You may not need the -4 , but without it my connection would fail every few minutes and I would have to request a new lease.
Also if you are using encryption you will need to set up /etc/wpa_supplicant.conf and change the above lines to something more like:
#ifconfig wlan0 up
# wpa_supplicant -Dwext -i wlan0 -c/etc/wpa_supplicant.conf -B

#dhclient wlan0
Now your overo is all set! Unplug the mini-USB and reset the Overo. After about a minute you should see the outermost blue LED blink violently then remain lit. This means you are connected.
To make things easier on ourselves and ROS, lets make another similar entry in /etc/hosts. This time assume the gumstix is 192.168.1.8 and we want to name it gummy
#echo "192.168.1.8 gummy" >> /etc/hosts
no tricks there. Now you can log into your overo wirelessly simply by running
ssh [user]@gummy
You can now run your ROS programs , and the two computers should be able to find each other seamlessly.


